Friday, 17 May 2013

Graveyard Wedding Cake

This cake was a lot of fun to make - it was a cake of many firsts for me!  My first wedding cake, first time to make a hill out of cake, first time to make a cobblestone path, first time to make wrought iron fencing, first time to use a rice bubbles and marshmallow mix to make walls.. even the first time that I made black royal icing!  I found many tips along the way that I will share in my next posts.
 
This cake was a mint chocolate mud cake with chocolate buttercream.  It was pretty tasty, and got lots of comments at the wedding :)  The Corpse Bride cake topper is an ornament, but the rest of the cake is edible.
 
Stay tuned for more 'how to' posts.
 
-N-

Saturday, 23 March 2013

How to Swirl Buttercream Icing

So I finally learned how to swirl buttercream icing.  Lots of people told me it was easy (you might have been one of them).  They told me that it was all about using a big tip (and I tried a lot of different tips).  And that you just needed to swirl it (not very helpful advice, by the way).  But it just didn't work out for me.  Until I found this post and this post which actually made sense and I found really easy to follow.  Which means that my cupcakes now look like this (just in time for M's baby shower - these ones are chocolate mudcake with vanilla buttercream).
 
1M tip
So.. it actually is easy (once someone explained it) and I found Wilton's 1M tip (open star) worked for me.  The main difference between these swirls and ones I have done before is that you start in the centre, holding the piping bag at a 90 degree angle (or close to it), and pipe a star in the middle. 

Keep pressure on the bag and pipe a line down to the outside edge of the cupcake.  Then swirl it in a circle around the outside edge (near the cupcake paper).  

Next, without releasing pressure, pipe another circle on top, moving toward the middle of the cupcake. Then pipe a third circle and finish in the centre of the cupcake.

And voila!  You now know how to swirl buttercream icing.  (Or if you still don't, check out the posts that helped me :)
-N-

PS Stay tuned for a graveyard wedding cake that I will be making in May!

Friday, 1 March 2013

Cassidy's Cupcakes

My 13 year old niece has been asking me for ages to show her how to decorate cupcakes.  She came and stayed at our place for a sleep-over, and despite being REALLY tired from swimming lessons, she made some great cupcakes.  We had fun using plunger cutters to make butterflies, silicone moulds for starfish, texture mats (what a great invention) and lots of confetti sprinkles.  Here's to many more afternoons of cake decorating together :)

-N-

Thursday, 3 January 2013

Christmas Biscuits and Book Cake

 In an attempt to catch up on cakes and bakes from 2012, here is what I made in December:


Christmas Biscuits:  Every year, I make my staff something for Christmas, and this year I made biscuits.  These snowman and candy cane biscuits were fun to make.  I used an embossed roller to make the pattern on the scarf.


Book Cake:  We host 'Second Tuesday Bookclub' each month.  This year was our fourth birthday and so this cake is supposed to look like a stack of four books.  The one second from the top looks a bit wonky, but my theory is that it's a well-read book :)


My new apron: And although it's not a cake, I had to show off my new apron, made for me by Bron at A Bron Creation. Bron had the job of creating four new items from my nana's supper cloth - she made aprons for my mum, my sister and me, plus a bag for my niece.  My nana would love that her hard work embroidery isn't just sitting in a cupboard somewhere.  Thanks Bron! 


-N-

Monday, 31 December 2012

70th Birthday Cake

Heatwaves and cakes don't mix very well.

8 days of temperatures in the high 30s and 40s meant that I stayed up until 3.45am on the morning that the cake was being picked up just so the whole thing didn't melt.  We have air-conditioning, but I found that the fondant dried out really quickly, so I had to re-do the lettering numerous times for it to even be legible.  Luckily they wanted the cake covered in buttercream rather than fondant, so I didn't have to work out how to deal with a whole cake of dried out fondant! The buttercream set really quickly, so the finish wasn't quite as smooth as I would have liked.  It tasted good though, so that's the main thing.

This was a big chocolate mud-cake - so big that it didn't fit in my oven.  I decided to make two separate 30cm x 30cm cakes and then join one-and-a-half of them together.  I used the rest for our New Years' Eve dessert.  It took quite a bit of problem-solving to work out how to fit both of them in our fridge with all of the rest of our post-Christmas food. Just as well I'm good at Tetris :)

Wishing you all a happy 2013.  I still have a back-log of cakes to show you from 2012, so hopefully I will post about them soon.

-N-

Tuesday, 20 November 2012

Doctor Doom Cake

My hubby is a comic book nerd - I say that with affection :)  Last year I made this Spider-Man cake for his birthday, using the Wilton 3D Skull pan (I have no idea how to carve cakes so the tin was very helpful).  This year he wanted a Doctor Doom cake for his birthday.  And yes, his birthday was in September - I'm just super-slow at posting.

Who is Doctor Doom?  I know him from the Fantastic Four movie (he's the bad guy), but apparently he is in lots of Marvel comics.. I think.

Doctor Doom Cake
So, I was given a Doctor Doom figurine as a guide, used the trusty 3D Skull pan again, and this was the result.  My hubby was pretty happy with the cake, although it did cause me a couple of headaches - I didn't realise that his eyes were supposed to look like that, so I had to add in the bar bits after I thought that I had finished the cake!  But it was all finished in time for his surprise birthday dinner.  

This is a chocolate mudcake, filled with chocolate buttercream.  The icing is all edible fondant, including the silver food-safe paint.  Having said that, there is a whole lot of food colouring in the icing, so I just ate the cake :)


Here are the pictures which show the step-by-step process for anyone who is interested:
Join the two halves of cake together & cover in buttercream
Add the extra shape with fondant (or cake if you'd prefer) - Doctor Doom has a big chin :)
Cover the whole cake in fondant
Add extra fondant to make the shape of the mask - I made a pattern first with baking paper
Paint with edible silver paint (from cake shops)
Add the green fondant for his hood.  Tissue helped to hold the fondant while it dried
Almost finished
Paint the eyes and mouth in a darker silver


My hubby's friends from Comic Zone think that I should give them some business cards and specialise in comic book character cakes.  Let's see what I have to make next year!

-N-

Thursday, 15 November 2012

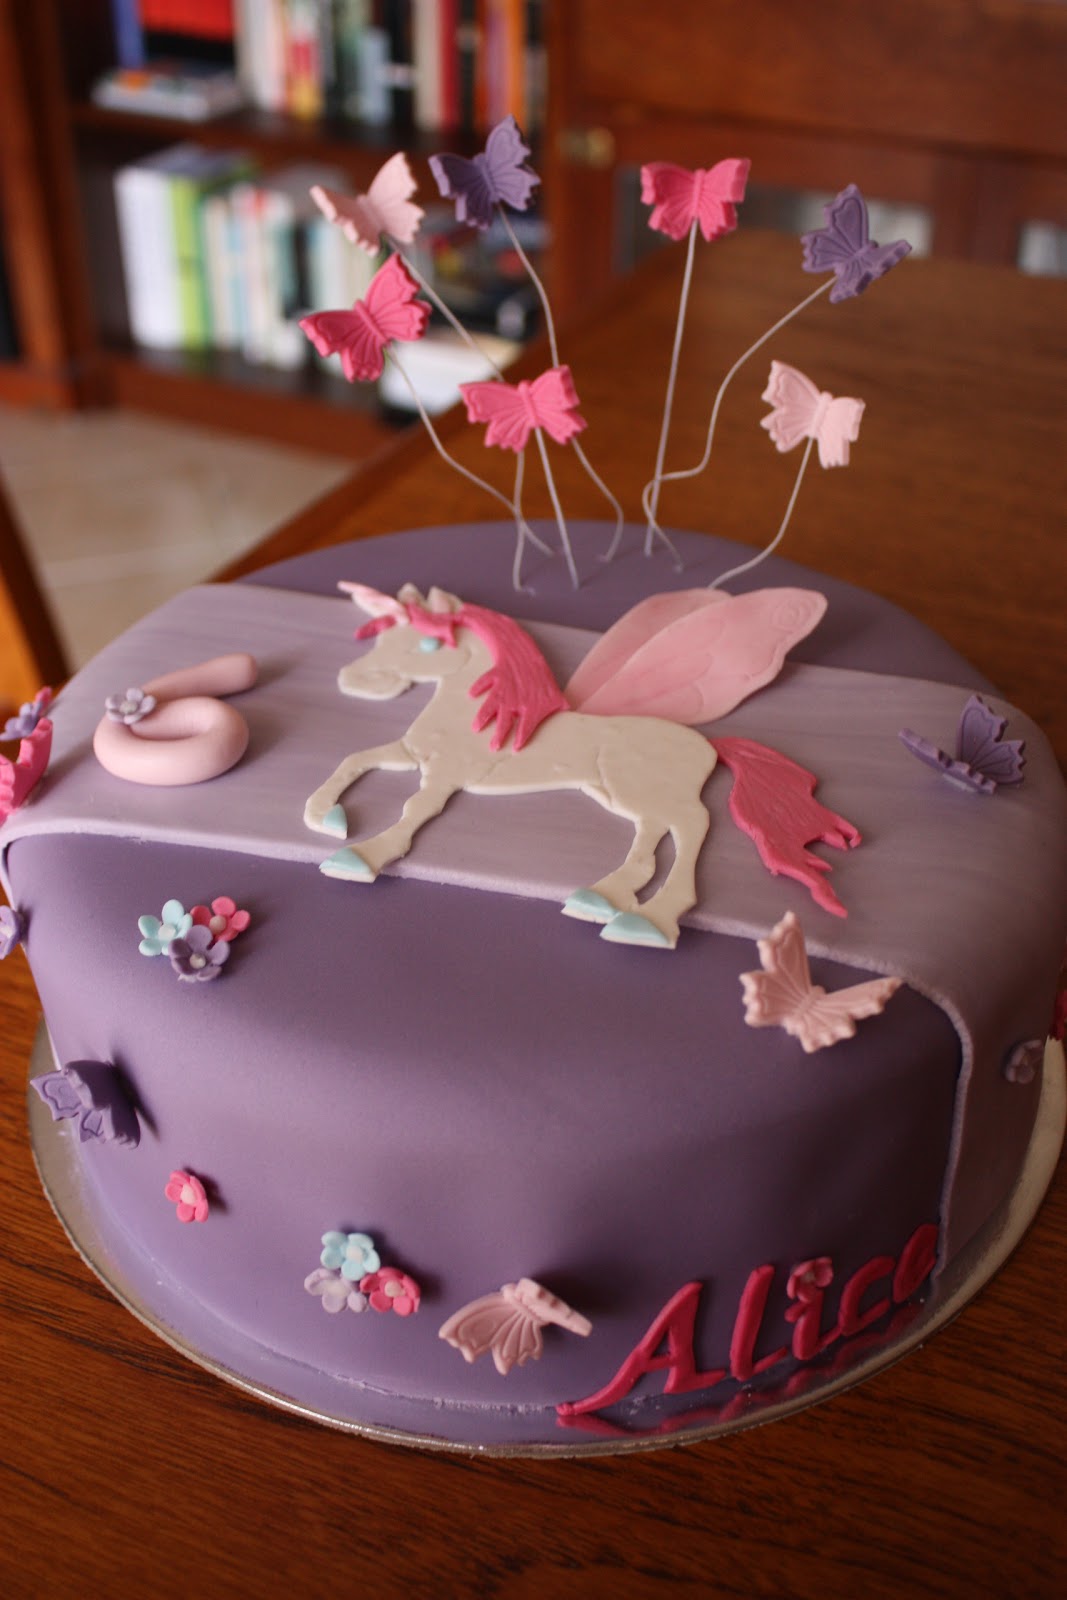
Unicorn Cake

Wow, I am not good at keeping this blog up to date. Whoops.  I'm always hanging out for other bloggers to post, but forget to do the same :)

Well, here is my latest cake.  I was asked to make a unicorn cake for Alice's 6th birthday.  This was the first cake where I have had issues with air bubbles under the fondant.  Ugh!  It was stressful!  The first one appeared after the icing had dried overnight.  And set.  But it was only a little air bubble and I sorted it out (or so I thought) using a pin and smoothing the icing down.  Then I went to work for the day.  And arrived home to a massive volcano air bubble.  Ok, so it wasn't really the size of a volcano, but it was pretty big.  I thought that I was going to have to pull off all of the purple fondant and start again, because the whole layer had set into something that resembled a hill.  The pale purple layer came in handy to cover the hole that I had to create to get rid of the air bubble!  The rest of the cake was pretty uneventful, but I won't be leaving any cakes anywhere near a window again (curtain closed or not!).

-N-